 |
| Credits |
I decided to sew my own bow tie, the REAL kind you tie on and not the futile clip on. (Although after a couple of failed attempts to tie my bow tie I did CONSIDER making a clip on...) It was a super simple project, and you can use whatever scraps of fabric you have lying around.
MAKE YOUR OWN BOW TIE
Gather your materials. You'll need a pre-existing bow tie that fits you or the person you intend to make the bow tie for (pictured is said bow tie I made a few days ago), OR a template for your bow tie.
(I can't remember where I got my pattern from, but here is a similar one.)

Source some fabric - I'm using this ridiculous Mr. Bean Fabric, which I think is cotton, but any vaguely stiff material should be suitable to make your bow tie (note- chiffon is not your friend when making a bow tie). Grab your sewing machine/needle, and away we go!
Cut out your pieces. If you are using a template for your bow tie, make sure your measure the neck that plans to become the bow tie's resting place, and correspond this to the neck strap of your bow tie. If you're using another bow tie, be sure to consider the seam allowance (in other words, trace a couple of millimetres extra so you can sew the bow tie into the appropriate shape.)

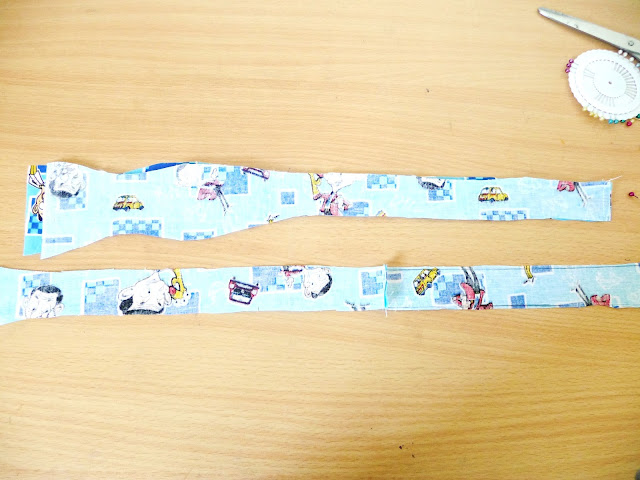
I cut my bow tie in 4 pieces as my fabric wasn't long enough, but if you have a great deal of fabric you can probably just cut a single strip for each side (2 pieces). If you don't have enough fabric, simply cut the bow tie template out a couple of inches above the 'fish'. You can use ribbon or an odd fabric as the neck strap. I also cut out another 2 pieces of the fabric as interfacing to make the bow tie stiffer and hold it's shape.
If you end up making the bow tie in several pieces, you'll need to sew the ends together to make a continuous strip like so.
Pin together and sew your bow tie! Make sure your interfacing is not sandwiched in between the main pieces or else your bow tie will look very odd when you turn it inside out. Instead, lay it on top of the main pieces.

Leave about 2 inches (5cm) of space unstitched somewhere along the neck strap (I suggest the middle!) to turn your bow tie inside out.

Iron your bow tie and sew up the neck strap.

TYING YOUR BOW TIE
Despite my time at Christchurch Girls' and other occasions where normal ties were standard for performance, I never really got the hang of tying a tie (try say that 5 times fast). After making my first bow tie, I had to of course, learn to tie it.
Don't fret! I failed for about 2 hours watching useless Youtube videos, but I can finally say that with the help of this extremely long video, I finally realised what I was doing wrong.
Hooray!

Good luck with your bow tie tying! Don't be afraid to show of your snazzy bow, I wore my floral one to Remuera Library and it is my pleasure to report everyone looked at me like I was insane. Heh. Well that isn't new.


Hi I like it
ReplyDeleteFrom your secret noticer
Hello, I have browsed most of your posts. This post is probably where I got the most useful information for my research. Thanks for posting, maybe we can see more on this. Are you aware of any other websites on this subject.
ReplyDeletestriped ties